


Frequently Asked Questions
Find answers to commonly asked questions below.

If you want to bird proof solar panels, the job is simpler than it sounds. You close the gap between the panels and the roof so birds can't get in, and you keep it closed. The detail is where people come unstuck.
This guide gives you the whole process at a glance: why it's worth doing, the steps in order, what to look for in the mesh, and the point where it stops being a sensible DIY job. For the nuts and bolts of fitting, we've written a separate step-by-step guide.
Because the space under an array is close to perfect for a nest. It's sheltered, shaded and dry, and pigeons, sparrows and starlings all happily nest in gutters and roof cavities. Once they've moved in, you get the whole package: droppings, nesting material, feathers and debris that washes into the gutters.

The benefits of closing that gap are fairly practical:
The risks of leaving it are just as practical. Removing panels just to clean beneath them costs far more than proofing them in the first place, and the risk is higher in urban areas with lots of birdlife and on shallow-pitched roofs.
Birds also carry parasites such as mites and lice, and their droppings can introduce bacteria, which is a fair reason not to have a nest sitting near your house.
Pigeons are the headline, but a sheltered nest-lined gap draws other animals too. Rodents can follow birds into the roof space, and rats and possums chew wiring.
Possums need special mention because they're a protected native species. You can't trap, relocate or kill one without a licence in NSW, and the state advises sealing entry points only once the possum has left the roof to forage. Other states have their own rules and guidance, such as Victoria and South Australia. For a homeowner, the takeaway is simple: use exclusion, never removal, and never seal an animal in.
Australian conditions matter for the barrier itself. Hard UV, summer heat, storms and, near the coast, salt air all test a material. Mesh that holds its shape and coating through a few summers is worth more than a cheap roll that doesn't.
Keep expectations sensible. Mesh closes off the gap under the panels. It doesn't make the whole roof pest proof.
Before you fit anything, look for nests and signs of activity. If you find eggs, chicks or an animal, stop. Some birds are protected, and sealing mesh over a live nest is the worst outcome for everyone. Your state wildlife authority or a licensed pest controller can advise.
Clear out old nesting material and droppings before the mesh goes on. Wear gloves, goggles and a mask, because council guidance on feral pigeons recommends protective gear for handling droppings. Skip the pressure washer. Water can get into panel edges and connectors and cause earth faults.
Measure all the edges you need to close, including corners and mounts, then add a little for overlaps and patching. Mesh is sold by the metre or in kits, so a good measurement saves you buying twice.
The mesh is clipped to the inside lip of the panel, pulled tight, trimmed, and overlapped and joined where lengths meet. Corners and mounts have their own method. Each step is easy to follow when you install solar panel mesh yourself, and the fitting method is the same for every kit.

Walk around the array and look for gaps, first from the ground, then again after the first strong wind. A bird needs only a small opening, so a loose join or corner is where a repeat problem starts.
If you're about to get panels, this is the cheapest and easiest time to do it. It's easier, and often cheaper, to add bird proofing as the panels are installed. The access is already there, the space under the array is clean and nobody has to go back up on the roof later.

Ask your installer whether they'll include mesh, and whether it's fixed in a way that suits the panel warranty. If they won't, you can still add it yourself later with a kit.
It helps to be clear about the limits, so you aren't surprised later.
Sparrows and starlings, like pigeons, nest in gutters and roof cavities, so if you've blocked the array and the birds are still hanging around, the gutters and eaves are the next place to look. Our bird proofing gutter guard page covers that side of the problem.
Pick your day. A calm, dry day is best for roof work, and cooler parts of the day are easier on you. Safe Work Australia notes that wind and rain raise the risk of falls and that heat and sun matter too.
After the job, make it a habit to glance at the mesh after strong winds and storms. A loose clip is a five minute fix if you catch it early and a repeat nest if you don't.
Not all mesh is equal. A few things are worth checking before you buy:
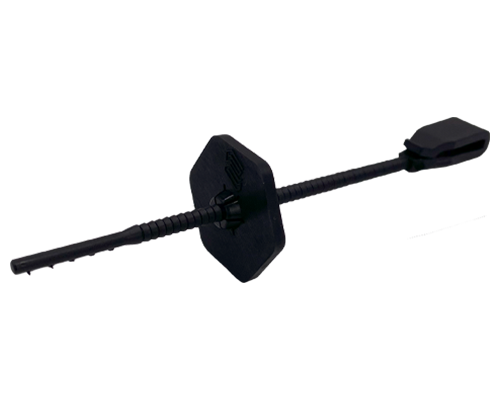
Our Solar Mesh Kit is 200mm wide on a 30 metre roll, made from 0.7mm Q195 carbon steel that's electro-galvanised and PVC coated, finishing at 1.0mm. It includes 100 nylon clips and washers and 20 cable ties, and there's a stainless steel 304 option if you'd prefer it. Compare mesh material, coating and opening size properly before you buy.
A confident homeowner can do most of this on a low, accessible roof, as long as there's no active nest. If your roof is steep or tiled, double storey or hard to reach, or you've got a big array, hire someone. Falls from height are the major cause of death and injury in roof work, says Safe Work Australia.

Whether to do it yourself or hire a professional comes down to the roof, the array and how you feel about heights.
Measure your array first, then compare kit sizes. If you'd like help working out how much mesh you need, call us on 1300 032 760, or look at the Solar Mesh Kit.
Each stage has its own detail. Fitting the mesh comes down to clips, overlaps and corners, choosing the right mesh is mostly about material and opening size, and the cost depends on your perimeter. The parts are in the solar mesh range and the mesh clips.
Mesh: Your corrugated roof Colorbond gutter guard kit comes with our durable Aluminium Gutter Guard Mesh. All kits are delivered in a gutter guard ...
View full detailsMesh: Your valley gutter guard kit for corrugated valleys comes with our durable aluminium mesh. It is delivered in roll form for easier installati...
View full detailsMesh: Your gutter guard for tiled roofs comes with our durable Aluminium Leaf Guard Mesh. It is delivered as a leaf guard mesh roll for easier inst...
View full detailsMesh: Your tiled roof valley guard kit for tiled roofs comes with our durable Aluminium Leaf Guard Mesh. Valley guard for tiled roofs is delivered ...
View full detailsMesh: Your Trimdek gutter guard kit comes with our durable Aluminium Gutter Mesh. All kits are delivered in a DIY gutter guard mesh roll for easier...
View full detailsFind answers to commonly asked questions below.